- Minimum server requirements
- Choose your path - easy way or hard way
- Setup Database
- Install Python Libraries
- Install additional requirements
- Setup pyfedi
- Setup .env file
- Initialise Database and Setup Admin account
- Run the app
- Database Management
- Keeping your local instance up to date
- Running PieFed in production
- Push notifications
- Accepting donations through Stripe
- Testing and debugging
- Pre-requisites for Mac OS
- Notes for Windows (WSL2)
- Notes for Pip Package Management
Any OS that runs Python 3.10+ 2 CPU cores 4 GB of RAM 40 GB of storage (eventually)
If your server will be used by more than 10 people, double the CPU and RAM.
PieFed is quite frugal with storage usage but it will grow over time. After 18 months of operation PieFed.social uses 100 GB of space, for example.
Docker can be used to create an isolated environment that is separate from the host server and starts from a consistent configuration. While it is quicker and easier, it's not to everyone's taste.
Doing things this way will give you the ultimate customization that larger instances need. You will need to be more careful about whether your OS is compatible with what PieFed needs:
- Python 3.9+
- PostgreSQL 13+
- Redis 6.x
PieFed should work on version 13.x or newer. If you have errors running flask init-db (don't run it now, later on), check your postrgesql version.
For installation environments that use apt as a package manager:
sudo apt update
sudo apt install libpq-dev postgresqlChoose a username and password. To use 'pyfedi' for both:
sudo -iu postgres psql -c "CREATE USER pyfedi WITH PASSWORD 'pyfedi';"Choose a database name, owned by your new user. For a database called and owned by 'pyfedi':
sudo -iu postgres psql -c "CREATE DATABASE pyfedi WITH OWNER pyfedi;"Pre-requisites for Mac OS
Notes for Windows (WSL2)
For installation environments that use apt as a package manager:
sudo apt install python3-pip python3-venv python3-dev python3-psycopg2For installation environments that use 'apt' as a package manager:
sudo apt install redis-server
sudo apt install git
sudo apt install tesseract-ocr
Developers might want to use ruff as a pre-commit linter. Install it with pip install ruff then use ruff check to analyze code.
We have supplied a ruff.toml config file in the root of the project.
- Clone PieFed
git clone https://codeberg.org/rimu/pyfedi.git
cd pyfedi
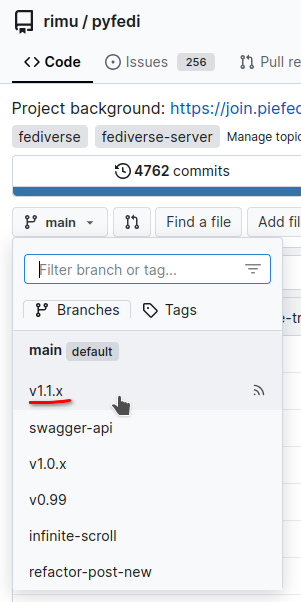
git checkout v1.6.xChange the 'git checkout' line to be the latest release. Check the branch name to find what to use after 'checkout' by going to https://codeberg.org/rimu/pyfedi and then clicking on the 'main' box:
- set up and enter virtual environment
python3 -m venv ./venv
source venv/bin/activate- Use pip to install requirements
pip install wheel setuptools
pip install -r requirements.txt
(see Notes for Windows (WSL2) if appropriate)
- Copy
env.sampleto.env - Edit
.envto suit your server. - Using the same username, password, and database name as used when setting up database, set the connection up, something like this:
DATABASE_URL=postgresql+psycopg2://username:password@localhost/database_name- Also change
SECRET_KEYto some random sequence of numbers and letters.
- Also change
-
SERVER_NAMEshould be the domain of the site/instance. Use127.0.0.1:5000during development unless using ngrok. Just use the bare domain name, without https:// on the front or a slash on the end. -
CACHE_TYPEcan beFileSystemCacheorRedisCache.FileSystemCacheis fine during development (setCACHE_DIRto/tmp/piefedor/dev/shm/piefed) whileRedisCacheshould be used in production. If usingRedisCache, setCACHE_REDIS_URLtoredis://localhost:6379/1orunix:///var/run/redis/redis.sock?db=1. Visit https://yourdomain/testredis to check if your redis url is working. -
CELERY_BROKER_URLis similar toCACHE_REDIS_URLbut with a different number on the end:redis://localhost:6379/0. If using unix socket, try something likeCELERY_BROKER_URL='redis+socket:///var/run/redis/redis.sock?virtual_host=0' -
MAIL_*is for sending email using a SMTP server. LeaveMAIL_SERVERempty to send email using AWS SES instead. Set MAIL_FROM to a no-reply inbox. -
Set ERRORS_TO to an email address that will receive error reports. Only do this if debugging problems and you have MAIL_* set.
-
AWS_REGIONis the name of the AWS region where you chose to set up SES, if using SES. SES credentials are stored in~/.aws/credentials. That file has a format like[default] aws_access_key_id = JKJHER*#KJFFF aws_secret_access_key = /jkhejhkrejhkre region=ap-southeast-2You can also use environment variables if you prefer.
-
Test email sending by going to https://yourdomain/test_email. (after setting the FLASK_DEBUG environment variable to 1). It will try to send an email to the current user's email address. If it does not work check the log file at logs/pyfedi.log for clues.
-
BOUNCE_ADDRESS is where email bounces will go to. If BOUNCE_* is configured then all emails in that inbox will be treated as bounces and deleted after extracting the email addresses in them. Use a dedicated inbox for bounces, not a inbox you also use for other purposes.
-
Set FLAG_THROWAWAY_EMAILS = 1 to see a warning on throwaway email addresses during registration approvals - https://piefed.social/post/758768
-
Enable image blocking by setting IMAGE_HASHING_ENDPOINT to the url of a PDQ hashing instance.
-
If the home page is loading slowly, set PAGE_LENGTH to a lower number.
Setting FLASK_DEBUG=1 in the .env file will enable the <your-site>/dev/tools page. It will expose some various testing routes as well. See the testing section.
That page can be accessed from the Admin navigation drop down, or nav bar as Dev Tools. That page has buttons that can create/delete communities and topics. The communities and topics will all begin with "dev_".
Note that SSL is not a hard requirement for local testing or development. By including HTTP_PROTOCOL='http' in the .env file, some features will play a little nicer without SSL. This is not a teribly well-vetted workflow, so there might still be cases in which SSL is expected/required (such as S3 usage). This is primarily intended to ease development of basic features or UI changes.
export FLASK_APP=pyfedi.py
flask db upgrade
flask init-db
(choose a new username, email address, and password for your PyFedi admin account)
If you see an error message ModuleNotFoundError: No module named 'flask_babel' then use venv/bin/flask instead of flask
for all flask commands.
After setting up your .env file and your database, you can verify your configuration is correct by running:
export FLASK_APP=pyfedi.py
source venv/bin/activate
flask config_check
This command will check your environment variables for proper format, test database and Redis connections, verify directory permissions, and identify common configuration issues. Fix any errors reported before proceeding. For warnings you'll need to use your judgement.
flask run(open web browser at http://127.0.0.1:5000)
(log in with username and password from admin account)
For development purposes, that should be enough - see ./dev_notes.txt for a few more bits and pieces. Most of what follows is for running PieFed in production.
In future if you use git pull and notice some new files in migrations/versions/*, you need to do:
source venv/bin/activate #if not already in virtual environment
flask db upgradecreate a migration based on recent changes to app/models.py:
flask db migrate -m "users table"run migrations:
flask db upgradeIn a development environment, all you need to do is
git pull
flask db upgrade
In production, celery and flask run as background services so they need to be restarted manually. Run the ./deploy.sh script
to easily restart services at the same time as pulling down changes from git, etc.
Federation doesn't work without SSL, without a domain name or without your server being accessible from outside your network. So, when running on http://127.0.0.1:5000 you have none of those.
The site will still run without federation. You can create local communities and post in them...
My way around this is to use ngrok.com, which is a quick and simple way to create a temporary VPN with a domain and SSL. The free plan comes with ephermeral domain names that change every few days, which will break federation, or one randomly-named static domain that will need re-launching every few days. $10 per month will get you https://yourwhatever.ngrok.app which won't change.
Once you have ngrok working, edit the .env file and change the SERVER_NAME variable to your new domain name (all lower case).
Running PieFed in production relies on several additional packages that need to be installed.
source venv/bin/activate #if not already in virtual environment
pip3 install gunicorn celery
Copy celery_worker.default.py to celery_worker.py. Edit DATABASE_URL and SERVER_NAME to have the same values as in .env.
Edit gunicorn.conf.py and change worker_tmp_dir if needed.
You will want to tune PostgreSQL. More on this.
If you have more than 4 GB of RAM, consider turning on 'huge pages'
also see this. Turn off JIT by adding jit=off to your postgresql config.
PgBouncer can be helpful for instances with > 800 MAU.
To assess whether to accept a registration application it can be helpful to know the country of the applicant. If you are using CloudFlare then add COUNTRY_SOURCE_HEADER='CF-IPCountry' to your .env. Otherwise, use the ipinfo service - register with them to get an API token and put it into your .env file (IPINFO_TOKEN).
If the search function is not returning any results, you need to add some database triggers.
Enable the API for use by mobile apps by setting the ENABLE_ALPHA_API environment variable to 'true' (a string, with quotes).
To limit which domains can access the API, set the CORS_ALLOW_ORIGIN environment variable. This defaults to '*' (allowing requests from any origin) but can be set to a specific domain like 'https://example.com' for security.
In production, Gunicorn and Celery need to run as background services:
Create a new file:
sudo nano /etc/systemd/system/pyfedi.serviceAdd the following to the new file, altering paths as appropriate for your install location
[Unit]
Description=Gunicorn instance to serve PieFed application
After=network.target

[Service]
User=rimu
Group=rimu
WorkingDirectory=/home/rimu/pyfedi/
Environment="PATH=/home/rimu/pyfedi/venv/bin:/usr/local/sbin:/usr/local/bin:/usr/sbin:/usr/bin:/sbin:/bin:/usr/games:/usr/local/games:/snap/bin"
ExecStart=/home/rimu/pyfedi/venv/bin/gunicorn --config gunicorn.conf.py --preload pyfedi:app
ExecReload=/bin/kill -HUP $MAINPID
Restart=always


[Install]
WantedBy=multi-user.target
Create another file:
sudo nano /etc/systemd/system/celery.serviceAdd the following, altering as appropriate
[Unit]
Description=Celery Service
After=network.target

[Service]
Type=simple
User=rimu
Group=rimu
WorkingDirectory=/home/rimu/pyfedi
ExecStart=/bin/bash -c '. /etc/default/celeryd && exec "$CELERY_BIN" -A "$CELERY_APP" worker --loglevel="$CELERYD_LOG_LEVEL" $CELERYD_OPTS'
Restart=on-failure
RestartSec=10

[Install]
WantedBy=multi-user.target
Create another file:
sudo nano /etc/default/celeryd
Contents (change paths to suit):
# The names of the workers. This example creates one workers
CELERYD_NODES="worker1"

# The name of the Celery App, should be the same as the python file
# where the Celery tasks are defined
CELERY_APP="celery_worker.celery"

# Log and PID directories
CELERYD_LOG_FILE="/var/log/celery/%n%I.log"
CELERYD_PID_FILE="/dev/shm/celery/%n.pid"

# Log level
CELERYD_LOG_LEVEL=INFO

# Path to celery binary, that is in your virtual environment
CELERY_BIN=/home/rimu/pyfedi/venv/bin/celery
CELERYD_OPTS="--autoscale=5,1 --queues=celery,background,send"
sudo systemctl enable pyfedi.service
sudo systemctl enable celery.service

sudo systemctl start pyfedi.service
sudo systemctl start celery.service
Check status of services:
sudo systemctl status pyfedi.service
sudo systemctl status celery.service
Inspect log files at:
/var/log/celery/*/var/log/nginx/*/your_piefed_installation/logs/pyfedi.log
You need a reverse proxy that sends all traffic to port 5000. Something like:
proxy_cache_path /dev/shm/nginx levels=1:2 keys_zone=mycache:20m max_size=1g inactive=100m;

upstream app_server {
    # fail_timeout=0 means we always retry an upstream even if it failed
    # to return a good HTTP response

    # for UNIX domain socket setups
    # server unix:/tmp/gunicorn.sock fail_timeout=0;

    # for a TCP configuration
    server 127.0.0.1:5000 fail_timeout=0;
    keepalive 2;
}

server {
    server_name piefed.social
    root /whatever

    keepalive_timeout 30;
    ssi off;

    location / {
        # Proxy all requests to Gunicorn
        proxy_set_header X-Forwarded-For $proxy_add_x_forwarded_for;
        proxy_set_header X-Forwarded-Proto $scheme;
        proxy_set_header Host $http_host;
        proxy_redirect off;
        proxy_http_version 1.1;
        proxy_set_header Connection "";
        proxy_pass http://app_server;
        ssi off;

        # Bypass cache for logged-in users
        set $no_cache 0;
        if ($http_cookie ~* "session=") {
            set $no_cache 1;
        }

        # Enable caching
        proxy_cache mycache;
        proxy_cache_bypass   $no_cache $http_cache_control;
        proxy_no_cache       $no_cache $http_cache_control;

        proxy_cache_valid any 0;    # default: don't override app TTLs

    }

    # Serve static files directly with nginx
    location /static/ {
        alias /whatever/app/static/;
        expires max;
        access_log off;
    }

    client_max_body_size 100M;

}
The above is not a complete configuration - you will want to add more settings for SSL, etc. See also https://codeberg.org/rimu/pyfedi/issues/136#issuecomment-1726739
Change the proxy_cache_path to /var/cache/nginx if you don't have much RAM.
Recommended anti-scraper (they use fake user agent strings) config:
    # Scrapers often use old user-agents
    if ($http_user_agent ~* "(Chrome/[0-9]{1,2}(?![0-9])|Firefox/[0-9]{1,2}(?![0-9])|Safari/([0-9]|1[0-4])(?![0-9]))") {
        return 403;
    }
    if ($http_user_agent ~* "(Opera/[0-9]|Presto/|MSIE|Trident/)") {
        return 403;
    }
piefed.social {
        # Serve static files directly with caddy
        handle_path /static/* {
                root * /whatever/app/static/
                file_server
                header Cache-Control "max-age=31536000"
        }

        reverse_proxy :5000
}
To send email reminders about unread notifications, put this in a new file under /etc/cron.d
1 */6 * * * rimu cd /home/rimu/pyfedi && /home/rimu/pyfedi/email_notifs.sh
Change /home/rimu/pyfedi to the location of your installation and change rimu to the user that piefed runs as.
Once a week or so it's good to run remove_orphan_files.sh to save disk space:
5 4 * * 1 rimu cd /home/rimu/pyfedi && /home/rimu/pyfedi/remove_orphan_files.sh
One per day there are some maintenance tasks that PieFed needs to do (run it at a time of low usage):
5 2 * * * rimu cd /home/rimu/pyfedi && /home/rimu/pyfedi/daily.sh
Every minute PieFed will retry federation sending attempts that failed previously:
*/1 * * * * rimu cd /home/rimu/pyfedi && /home/rimu/pyfedi/send_queue.sh
The send_queue cron job is also needed to make scheduled posts publish themselves and a few other things. Do not skip this one!
Email can be sent either through SMTP or Amazon web services (SES). SES is faster but PieFed does not send much email so it probably doesn't matter which method you choose.
PieFed uses Amazon's boto3 module to connect to SES. Boto3 needs to log into AWS and that can be set up using a file
at ~/.aws/credentials or environment variables. Details at https://boto3.amazonaws.com/v1/documentation/api/latest/guide/credentials.html.
In your .env you need to set the AWS region you're using for SES. Something like AWS_REGION = 'ap-southeast-2'.
A CDN like Cloudflare is helpful for instances with more than a handful of users.
Some Cloudflare tips:
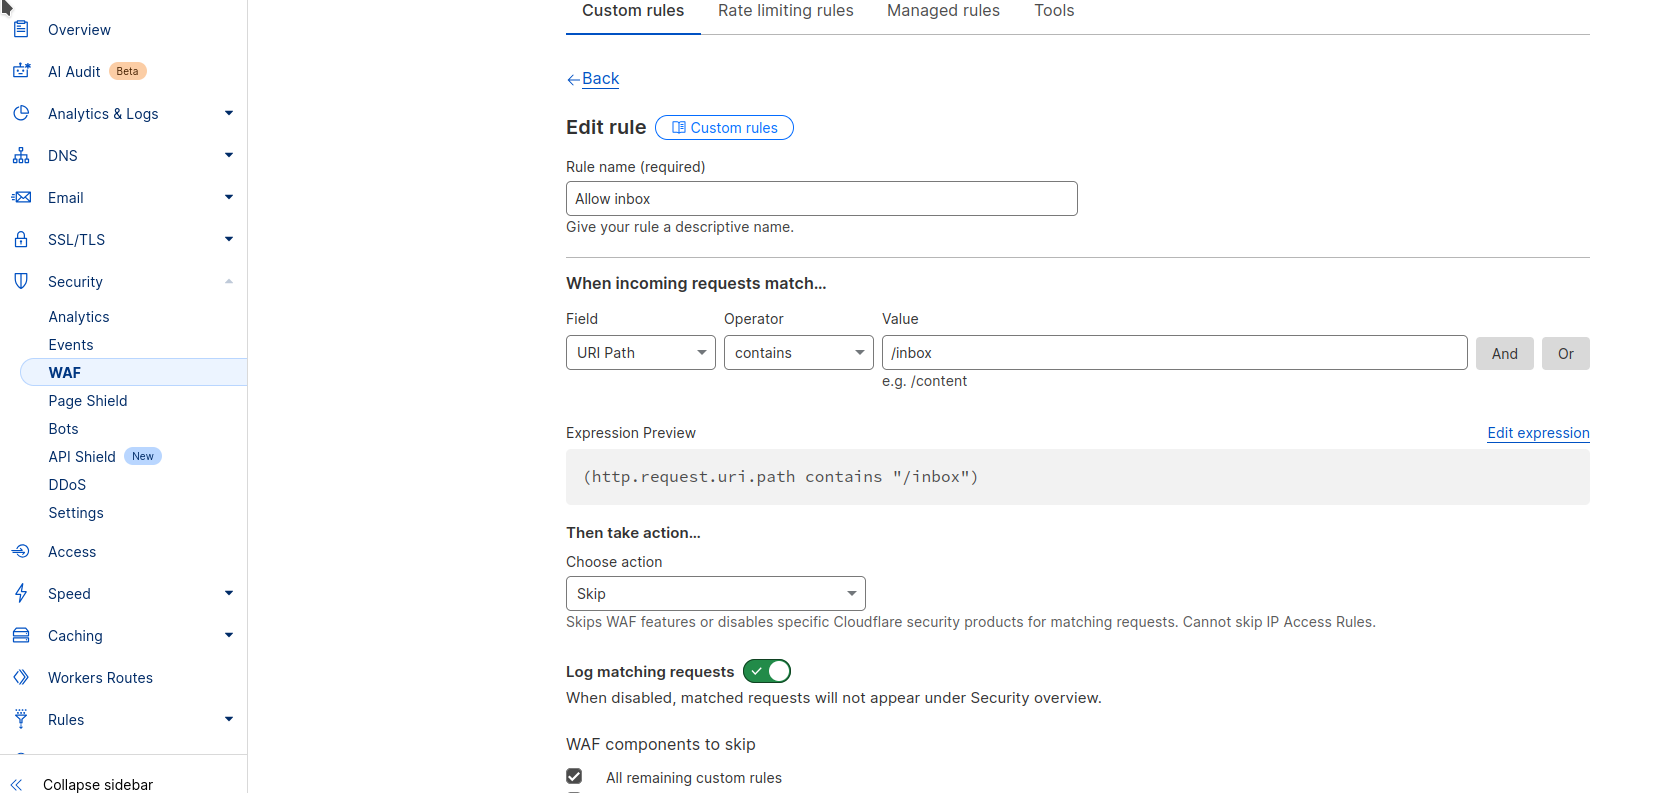
- Ensure you exclude the URL "/inbox" from the Cloudflare WAF as shown here. If you don't do this there will be federation issues.
- Under Speed -> Optimization -> Content Optimization, turn everything off especially "Rocket Loader" to avoid JavaScript problems.
- Under Speed -> Optimization -> Protocol Optimization, turn off HTTP/3 to avoid problems with Firefox.
- Cloudflare's bot protection / AI scraper blocker tends to play havoc with the API, you'll have a much better time if you turn this off entirely, in Security -> Settings.
PieFed has the capability to automatically remove file copies from the Cloudflare cache whenever
those files are deleted from the server. To enable this, set these variables in your .env file:
CLOUDFLARE_API_TOKEN- go to https://dash.cloudflare.com/profile/api-tokens and create a "Zone.Cache Purge" token.CLOUDFLARE_ZONE_ID- this can be found in the right hand column of your Cloudflare dashboard in the API section.
If you do NOT use a CDN that does compression, add this to your nginx configuration:
    gzip on;
    gzip_types text/css application/javascript image/svg+xml;
    gzip_vary on;
Over time images for user profile photos, image posts and link thumbnails will consume quite a lot of storage space so it is a good idea to use a cheaper form of storage such as AWS S3 or Cloudflare R2. The S3 API is widely implemented by many providers and PieFed can store media in any of them. Cloudflare does not charge egress fees so they are pretty good value. Wasabi is cheaper than Cloudflare and AWS - see the Wasabi setup tips.
To enable S3 storage you need to set these environment variables in your .env file:
- S3_REGION = 'auto'
- S3_BUCKET = 'piefed-media'
- S3_ENDPOINT = 'https://something_something.r2.cloudflarestorage.com'
- S3_PUBLIC_URL = 'media.piefed.social'
- S3_ACCESS_KEY = 'xyz'
- S3_ACCESS_SECRET = 'xyzxyz'
Cloudflare does not care about S3_REGION so it can be 'auto' but for AWS you should use something like us-east-1. All the other values are shown to you during the setup of the space (often called the "bucket") on your S3 provider.
Test your S3 connection by going to https://yourinstance.tld/test_s3. If it crashes, something is wrong. If you see 'Ok' all is well.
To use SMTP you need to set all the MAIL_* environment variables in you .env file. See env.sample for a list of them.
You need to set MAIL_FROM in .env to some email address.
Also set an environment variable FLASK_DEBUG to '1' ( export FLASK_DEBUG="1" ).
Log into Piefed then go to https://yourdomain/test_email to trigger a test email. It will use SES or SMTP depending on
which environment variables you defined in .env. If MAIL_SERVER is empty it will try SES. Then if AWS_REGION is empty it'll
silently do nothing.
You need to set these two environment variables:
- GOOGLE_OAUTH_CLIENT_ID
- GOOGLE_OAUTH_SECRET
The values for them are found by registering your instance with Google as 'an app'. Go to https://console.cloud.google.com/
to begin. Create a new project, enable the People API, go to APIs & Services > Credentials and create a new OAuth client ID.
Under "Authorized Redirect URIs", use https://yourdomain.tld/auth/google_authorize.
PieFed can connect to a LDAP server and use it in two different ways (you can enable one of the two, or both):
- read users
- write users
Either ways, you need to set the following environment variables:
LDAP_SERVER = 'ip address'
LDAP_PORT = 389
LDAP_USE_SSL = 0
LDAP_USE_TLS = 0
LDAP_BASE_DN = 'ou=users,dc=piefed,dc=social'
Then, depending on you use case, you can use the LDAP server to:
- Read users: log people in using their LDAP credentials.
Set the following environment variables:
LDAP_READ_ENABLE = 1
LDAP_READ_USER_FILTER_LOGIN = '(uid={username})'
LDAP_READ_ATTR_USERNAME_LOGIN = 'uid'
LDAP_READ_ATTR_EMAIL_LOGIN = 'mail'
Test this out by going to https://yourinstance.tld/test_ldap_login?user_name=something&password=something_else
- Write users: sync people info and credentials to the LDAP server so that other services can log in using the account details they use on your instance. piefed.social uses this to let people log in to chat.piefed.social and translate.piefed.social using their piefed.social account.
LDAP_WRITE_ENABLE = 1
LDAP_WRITE_BIND_DN = 'cn=admin,dc=piefed,dc=social'
LDAP_WRITE_BIND_PASSWORD = ''
LDAP_WRITE_USER_FILTER = '(uid={username})'
LDAP_WRITE_ATTR_USERNAME = 'uid'
LDAP_WRITE_ATTR_EMAIL = 'mail'
LDAP_WRITE_ATTR_PASSWORD = 'userPassword'
Test this out by going to https://yourinstance.tld/test_ldap
At /admin/pages there is a markdown-based CMS which you can use to add pages to your instance. Create one with the url 'privacy' to override the default privacy policy. Create one with the url 'about' and it will be appended to the existing about page.
All other urls have no special behaviour and will just display the page.
To have realtime popup notifications your instance needs to run another service using systemd, similar to the pyfedi service from earlier.
Create a file called /etc/systemd/system/piefed-notifs.service:
[Unit]
Description=Uvicorn service to serve PieFed notifications
After=network.target

[Service]
User=rimu
Group=rimu
WorkingDirectory=/home/rimu/pyfedi/
Environment="PATH=/home/rimu/pyfedi/venv/bin:/usr/local/sbin:/usr/local/bin:/usr/sbin:/usr/bin:/sbin:/bin:/usr/games:/usr/local/games:/snap/bin"
ExecStart=/home/rimu/pyfedi/venv/bin/uvicorn fastapi_server:app --host 0.0.0.0 --port 8000
ExecReload=/bin/kill -HUP $MAINPID
Restart=always

KillSignal=SIGTERM
TimeoutStopSec=5
KillMode=control-group


[Install]
WantedBy=multi-user.target
This is basically the same as the pyfedi.service file from earlier, with a different ExecStart and a couple of extras.
Then enable it:
sudo systemctl enable piefed-notifs.service

sudo systemctl start piefed-notifs.service
Check status of service:
sudo systemctl status piefed-notifs.serviceYou need to configure Nginx on the main PieFed app server to proxy requests to /notifications/stream through to the piefed-notifs service.
To do that, add this to your nginx config:
upstream notif_server {
    server 127.0.0.1:8000 fail_timeout=0;
    keepalive 6000;
}
also, within the server block:
    location /notifications/stream {
            proxy_set_header X-Forwarded-For $proxy_add_x_forwarded_for;
            proxy_set_header X-Forwarded-Proto $scheme;
            proxy_set_header Host $http_host;
            proxy_http_version 1.1;
            proxy_set_header Connection "";
            proxy_pass http://notif_server;

            # Disable buffering and allow long-lived connections
            proxy_buffering off;
            proxy_cache off;
            proxy_redirect off;
            proxy_read_timeout 3600s;
            proxy_send_timeout 3600s;
            send_timeout 3600s;

            # For nginx event-based connection handling
            chunked_transfer_encoding on;
            keepalive_requests 10000;

            # Disable Nginx response buffering (important!)
            gzip off;
            tcp_nopush on;
   }
In .env, set the NOTIF_SERVER environment variable to the same url as your instance, e.g. NOTIF_SERVER = 'https://piefed.social'
(no slash on the end, https:// on the start).
The piefed-notifs service also significantly improves the efficiency of federation if your instance has busy local communities.
In env.sample there are all the environment variables you need to add to your .env for Stripe to work.
STRIPE_SECRET_KEY and STRIPE_PUBLISHABLE_KEY can be found on the Stripe dashboard.
STRIPE_MONTHLY_SMALL and STRIPE_MONTHLY_BIG are the Price IDs of two monthly recurring products. Find the price ID by editing a product you've made and then clicking on the 3 dot button to the right of the price.
Change STRIPE_MONTHLY_SMALL_TEXT and STRIPE_MONTHLY_BIG_TEXT to be the amounts of your product prices.
To get a WEBHOOK_SIGNING_SECRET you need to set up a webhook to send data to https://yourinstance/stripe_webhook, sending the checkout.session.completed and customer.subscription.deleted events.
Check these locations for interesting error messages:
- logs/pyfedi.log
- /var/log/celery/*.log
There are a few urls you can go to which will test things out and report a result or log an error. You need the FLASK_DEBUG environment variable set to 1 for these to work.
- https://yourinstance.tld/test_s3 - tests your S3 config
- https://yourinstance.tld/test_email - tests email sending
- https://yourinstance.tld/test_redis - tests the connection to redis
You can also run flask config_check to validate your configuration and identify potential issues with environment variables, database connections, and file permissions.
see this site: https://opensource.com/article/19/5/python-3-default-mac
brew install pyenvpyenv install 3.8.6
pyenv global 3.7.3Note..
You may see this error when running pip install -r requirements.txt in regards to psycopg2:
ld: library not found for -lssl
clang: error: linker command failed with exit code 1 (use -v to see invocation)
error: command 'clang' failed with exit status 1
If this happens try installing openssl... Install openssl with brew install openssl if you don't have it already.
brew install openssl
Add openssl path to LIBRARY_PATH :
export LIBRARY_PATH=$LIBRARY_PATH:/usr/local/opt/openssl/lib/
Important:
Python 3.14+ may cause some package or compatibility errors. If you are having issues installing packages from
requirements.txt, try using Python 3.9 instead with pyenv (https://github.com/pyenv/pyenv).
Follow all the setup instructions in the pyenv documentation and setup Python 3.9.
If you are getting installation errors or missing packages with pyenv, run
sudo apt-update
sudo apt install build-essential libssl-dev zlib1g-dev libbz2-dev libreadline-dev libsqlite3-dev curl libncursesw5-dev xz-utils tk-dev libxml2-dev libxmlsec1-dev libffi-dev liblzma-dev llvmsudo apt-get update
sudo apt-get upgrade
sudo apt-get install python3 python3-pip ipython3 libpq-dev python3-psycopg2 python3-dev build-essential redis-server
sudo apt-get install python3-venv**Note: ** (Replace <3.9> with your version number if you are using another version of Python, e.g. 'sudo apt-get install python3.10-venv' for Python 3.10. Repeat for the rest of the instructions below.)
python3.9 -m venv ./venv
source venv/bin/activate
Make sure that your venv is also running the correct version of pyenv. You may need to re-setup venv if you setup venv before pyenv.
Follow the package installation instructions above to get the packages
python3.9 -m pip install --upgrade pip setuptools wheel
pip install -r requirements.txtmake sure you have wheel installed:
pip install wheelinstall packages from a file:
pip install -r requirements.txtdump currently installed packages to file:
pip freeze > requirements.txtupgrade a package:
pip install --upgrade <package_name>See dev_notes.md and https://join.piefed.social/docs/developers/