- Registered domain name for external access
- Require SSL connection (Nginx/Caddy reverse proxy, Cloudflare Zero Trust Tunnel, Tailscale, Ngrok, etc.)
Note: This guide uses docker compose. Depending on your docker setup, you may need to use the command docker-compose instead.
git clone https://codeberg.org/rimu/pyfedi.git
cd pyfedi/
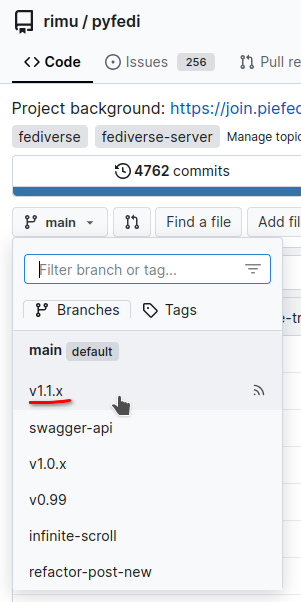
git checkout v1.5.xChange the 'git checkout' line to be the latest release. Check the branch name to find what to use after 'checkout' by going to https://codeberg.org/rimu/pyfedi and then clicking on the 'main' box:
sudo cp env.docker.sample .env.docker
sudo nano .env.dockerSECRET_KEY='...'- Replace text with random numbers and letters. Should be at least 32 characters long.SERVER_NAME='...'- Enter a registered domain name (do NOT includehttp://). Use the address127.0.0.1:8030for testing or development.
Note: If your testing/dev instance needs to federate with other instances then you will **need** a domain name. Ngrok.com has a free tier you can use - get this before proceeding because changing the `SERVER_NAME` variable later involves wiping all data and starting again. - Add additional variables (Mail, Cloudflare, etc.) relevant to your needs. See file `pyfedi/env.sample` for example variables.
- Check ports (8030:5000) and volume definitions if this is relevant to your needs. If not, skip this step.
sudo nano compose.yamlIf you want to customise compose.yaml it is better to make a copy of it named compose.override.yaml and make your changes in there.
Do not skip this. Enter your sudo password when prompted.
./docker-dirs.shThis will automatically create the following directories with the required permissions to continue:
- pyfedi/pgdata/
- pyfedi/media/
- pyfedi/logs/
- pyfedi/tmp/
export DOCKER_BUILDKIT=1
sudo docker compose up --build- Wait until text in terminal stops scrolling. Ignore the configuration check errors at this point.
- If you see many permission-related errors, try repeating the previous step (with the chown command using 1000 instead of your username)
- Test external access from browser (On port 8030). Watch for movement in terminal window. Browser will show "Internal Server Error" message. Proceed to initialize database to address this error message.
- Open a new terminal window
sudo docker exec -it piefed_app1 shThe above command will get you into a shell inside the container. Then, inside that shell run this:
export FLASK_APP=pyfedi.py
flask init-db- Enter username, email (optional), and password.
- Test external access from browser again. PieFed should now load. Login as admin with the same username and password.
exit- Close this terminal window
- Return to the main terminal window and press
CTRL+Cto temporarily shut down PieFed - Start PieFed in the background:
sudo docker compose up -d- During startup, you might see "Running configuration check..." followed by validation messages. Checkmarks (✅)
indicate successful configuration, warnings (
⚠️ ) are usually fine to ignore, but X marks (❌) indicate critical issues that need fixing.
At this point you have PieFed listening on port 8030. You will need Nginx, etc as a reverse proxy to forward connections on port 443 to 8030, or a Cloudflare tunnel going to 8030, or wireguard, etc.
You will have an easier time if Nginx runs on the host (if using Nginx) rather than in a container, so it can pass the client IP address through to PieFed more easily. Once everything else is set up, go to https://your-instance/test_ip and make sure it's detecting your IP address correctly.
sudo nano /etc/cron.d/piefed- Copy & Paste the text below
- Replace
<USERNAME>with account username
5 2 * * * <USERNAME> docker exec piefed_app1 bash -c "cd /app && ./daily.sh"
5 4 * * 1 <USERNAME> docker exec piefed_app1 bash -c "cd /app && ./remove_orphan_files.sh"
1 */6 * * * <USERNAME> docker exec piefed_app1 bash -c "cd /app && ./email_notifs.sh"
*/1 * * * * <USERNAME> docker exec piefed_app1 bash -c "cd /app && ./send_queue.sh"
Manually:
cd pyfedi/
sudo git pull
export DOCKER_BUILDKIT=1
sudo docker compose up -d --build
Provided script:
cd pyfedi/
./deploy-docker2.sh
NOTE: Major version updates may require extra steps. Check PieFed Meta for announcements and further instructions.
Run git update-index --assume-unchanged compose.yaml to make git ignore your custom compose.yaml and not try to update it if anything changes upstream.
sudo docker logs -f piefed_app1-fOption displays logs with constant updates. PressCTRL+Cto exit.
An alternative Compose file improves the developer experience by automatically reloading the application whenever Python or template files change. It also mounts your local files into the container so you don’t have to rebuild or restart on every edit.
Use:
sudo docker compose -f compose.dev.yaml upRefer to the bare metal install instructions for details about setting up email, S3, cdn and much more.
If your server has 4 GB of RAM or less then the default postgresql configuration in compose.yaml might use too much RAM. See this discussion for tuning ideas.